What are all the parts available in Jane to build a chart template? Well, let’s take a look!
And, a Jane Tip 💡: Many of these Chart Parts can be a tool to build out your Intake Forms. To learn more, head to the Questionnaires section of our Intake Forms guide!
And here's how you use them to build your charts:
🗂️ Organizing your charts:
✍️ Written notes:
📸 Charting on images:
🏎️ Quick-click charting:
🧮 By the numbers:
🚀 Sign-off:
🗂️ Organizing your charts
Using Templates
Your templates will show up in the bottom of your template list when you use the “New Chart Entry” button or “Add to Chart” function. You can create your own chart templates or, if you want to piggyback on someone else’s hard work, you can opt in to templates built by other practitioners in your clinic. Efficient!
Heading
Add a simple heading to your chart template. Here, we’ve added the heading “Recent Complaints” and then added a “Notes” section where patient complaints can be recorded:
Instruction
Add instructions to your template that will not be visible when exporting or printing the chart. One thing to note is that this chart part isn’t a printable or exportable item in Jane. This means that when charts are shared with this chart part, that portion of the form won’t be displayed.
If you need to show the details in the Instruction box to the patient, an option here would be to use the Note chart part instead.

✍️ Written notes
Primary Complaint
Create a Primary Complaint section in your chart template and use this space in your charting to log the primary reason a patient is visiting you today.
Note
This section (and all sections) can be re-labelled to suit your needs. Just click in the “Label” field of the “Edit Note” box and enter your own label. If you fill out any text in this area, it will load in real time in the Note Preview area.
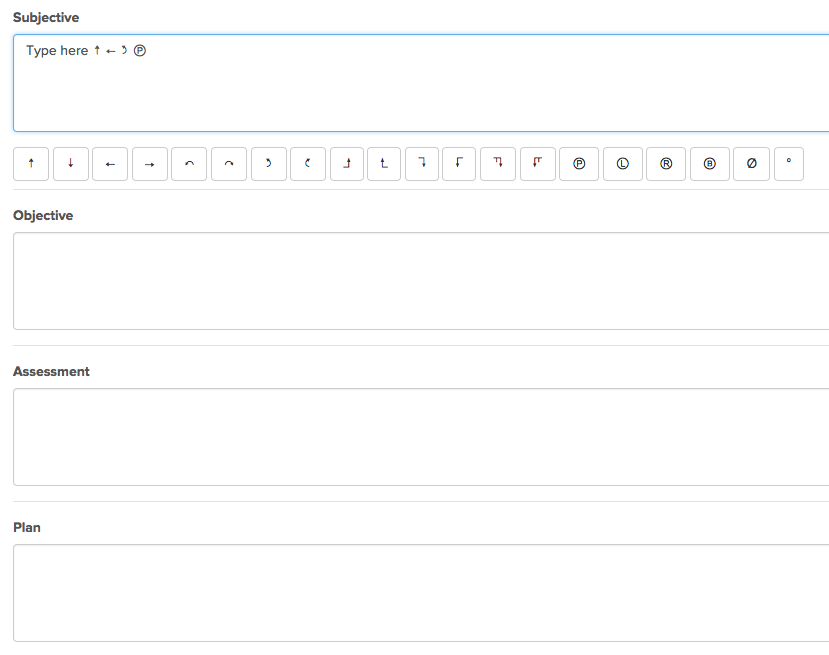
For example, a basic SOAP template could consist of 4 notes that have been renamed to Subjective, Objective, Assessment, and Plan.

Symbols in Notes
See those buttons hanging out at the bottom of a note chart part? They’re your shortcut for adding symbols that capture movement, direction, and rotation, so your chart notes can say a lot without extra typing.
↑ : Upward movement or superior direction
↓ : Downward movement or inferior direction
← : Leftward movement or left side
→ : Rightward movement or right side
↶ : Counterclockwise rotation (internal rotation)
↷ : Clockwise rotation (external rotation)
Ⓟ, Ⓛ, Ⓡ : Often used to denote side or context-specific charting (e.g. Ⓛ for left, Ⓡ for right)
Ⓡ (also) : Registered trademark symbol
° : Indicates degrees—commonly used for documenting range of motion (e.g. shoulder abduction to 90°)
Jane tip💡: The Smart SOAP Note chart part is part of Jane’s AI Scribe feature, Jane’s first AI-powered tool! This chart part uses a customizable prompt to summarize audio recordings of appointments, helping clinicians focus more on patient care and less on note-taking. It’s important to note that the Smart SOAP Note option only appears for clinics that have opted into this paid feature through the Settings tab > AI Scribe.
📸 Charting on images
Body Chart / Image Annotation
Jane’s Body Chart gives you options. You can always use Jane’s default body image:
And when you are charting for a patient during their appointment, you can use the toolbar to draw on any image you upload to this section or to add a numbered reference point. Remember that the toolbars and numbers won’t show up in the template building mode but they will when you load the template in a patient’s chart.
But some practitioners prefer to upload their own image. This is totally possible and you’ll have the same Edit options for your image of choice as with the default body chart. When you are creating your Chart Templates, simply upload any image of your choice to the Body Chart “Edit” box:
Side-by-Side
Our side-by-side photos feature allows you to upload two photos for a side-by-side comparison. Just like the body chart, you can draw on these images or add pointers that correspond to notes.
Click Change First Image to upload or take your first photo, and then click Change Second Image to do the same for your second picture.
While the default labels are “Before” and “After”, you can tweak these to your liking. For example, you might prefer “Left” and “Right”. To change these, click on the three dots to the right of the photo, followed by the pencil.
From there you can edit the image captions as needed.
Spine
Checkboxes for each joint, sketch on a spine diagram and notes.
Please note that, unlike the Body Chart item, the Spine chart can not be swapped for another image.
File/Image Upload
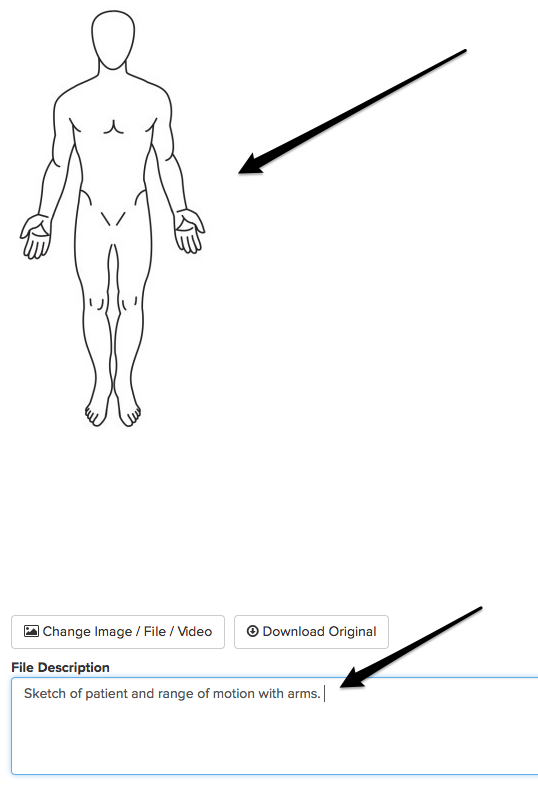
You can upload or add PDF, JPEG image, or any file type to a chart/clinical note and add a description:

Sketch
You can also add a sketch page to any template. This will give you an area to free draw with a stylus, touchscreen, or mouse. There are three colours you can choose from - black, red and blue.
You can use the sketch template as is to handwrite your notes, or upload a picture that you can mark up.
🏎️ Quick-click charting
Smart Options & Narratives
Smart Options & Narratives allow you to chart and/or build full narratives by clicking buttons! This is one of Jane’s most useful charting tools, but it takes a bit of time to set up. You can learn how here.
Check Boxes
Checkboxes can help reduce charting time.

When building your chart template add a label in the “Edit box”. Then start adding your options into the items below.
- To add an item click return or the plus icon
- To remove an item entire click the trash icon.
- To move an item click and drag the item up or down using the 6 dot gripper
Select from the Horizontal, Vertical, or Column layout to change how the checkboxes are formatted in your chart. For this type of formatting to work, “Include Notes” will need to be toggled off.
Lastly, if you’d like to hide the unchecked options from the final report, feel free to select Hide unchecked checkboxes after signing.
Dropdown
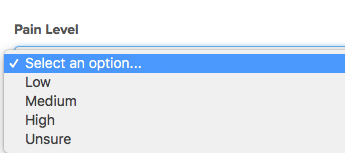
Dropdowns allow you to select one answer to a question or subject.

In the “Edit Drop Down” area, you would insert one item per line to get a selection of items for your dropdown menu:
Range/Scale
A customizable range/scale slider allows you to choose from a range of values - numbers, letters or words.
These values are easily customizable in the Chart Template “Edit” box. Just type the values you want to appear in the range scale, one item per line, and the scale populates in real time in the Chart Template Preview area.

Editing Quick-Click Chart Parts
When building your chart template add a label in the “Edit box”. Then start adding your options into the items below.
- To add an item click return or the plus icon
- To remove an item entire click the trash icon.
- To move an item click and drag the item up or down using the 6 dot gripper
🧮 By the numbers
Optical Measurements
The Optical Measurements option builds in common eye measurements and allows you to add additional notes when needed:
Vitals
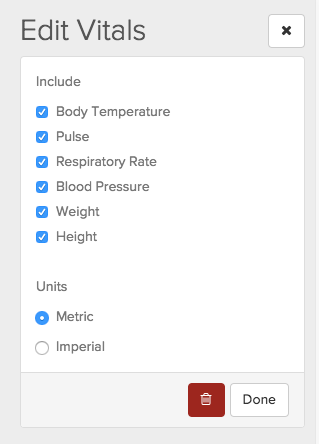
Use this to track and record a client’s vitals and also to record measurements from visit to visit. Note: When you create your chart template, you can choose whether you want to record in metric or imperial. Every time you bring up this chart template, your chosen system will appear by default.

🚀 Sign-off
Signature
The signature chart part is a quick and simple way for practitioners to collect a signature. This can be used to collect additional patient consent or supervisor approvals.
Please note that if this chart is duplicated, Jane removes the signature from the duplicated copy.
Additional Notes
If you’ve added a chart part to a template you’ve created and would like to remove it, you can hover your mouse over the specific chart part you’d like to remove. Next, click on the three horizontal black dots in the right corner of that section and click on the trashcan icon to delete that specific chart part without impacting the rest of the template
For more on how to work with these chart items, have a look at: Creating a Chart Template
Happy charting!